ArtGIS: A satellite view of British Columbia
Satellite imagery provides an unprecedented view of the Earth. And while there are extensive practical applications, it’s also neat to look at for its own sake. So I set out to create images of British Columbia using free and open access remote sensing products. I produced four images which highlight BC’s terrain, nighttime light footprint, and the difference between winter and summer seasons.
These images were created as a side project that I came back to a several times over the course of a few months. The intention was to use data that creates realistic images of BC. Lots more interesting images could be created, particularly by exploring other datasets. It’s not hard to find inspiration on the web! Even after spending a lot of time working with geospatial and remote sensing data professionally, it’s satisfying to take a creative perspective. The imagery that’s available to us is pretty amazing.
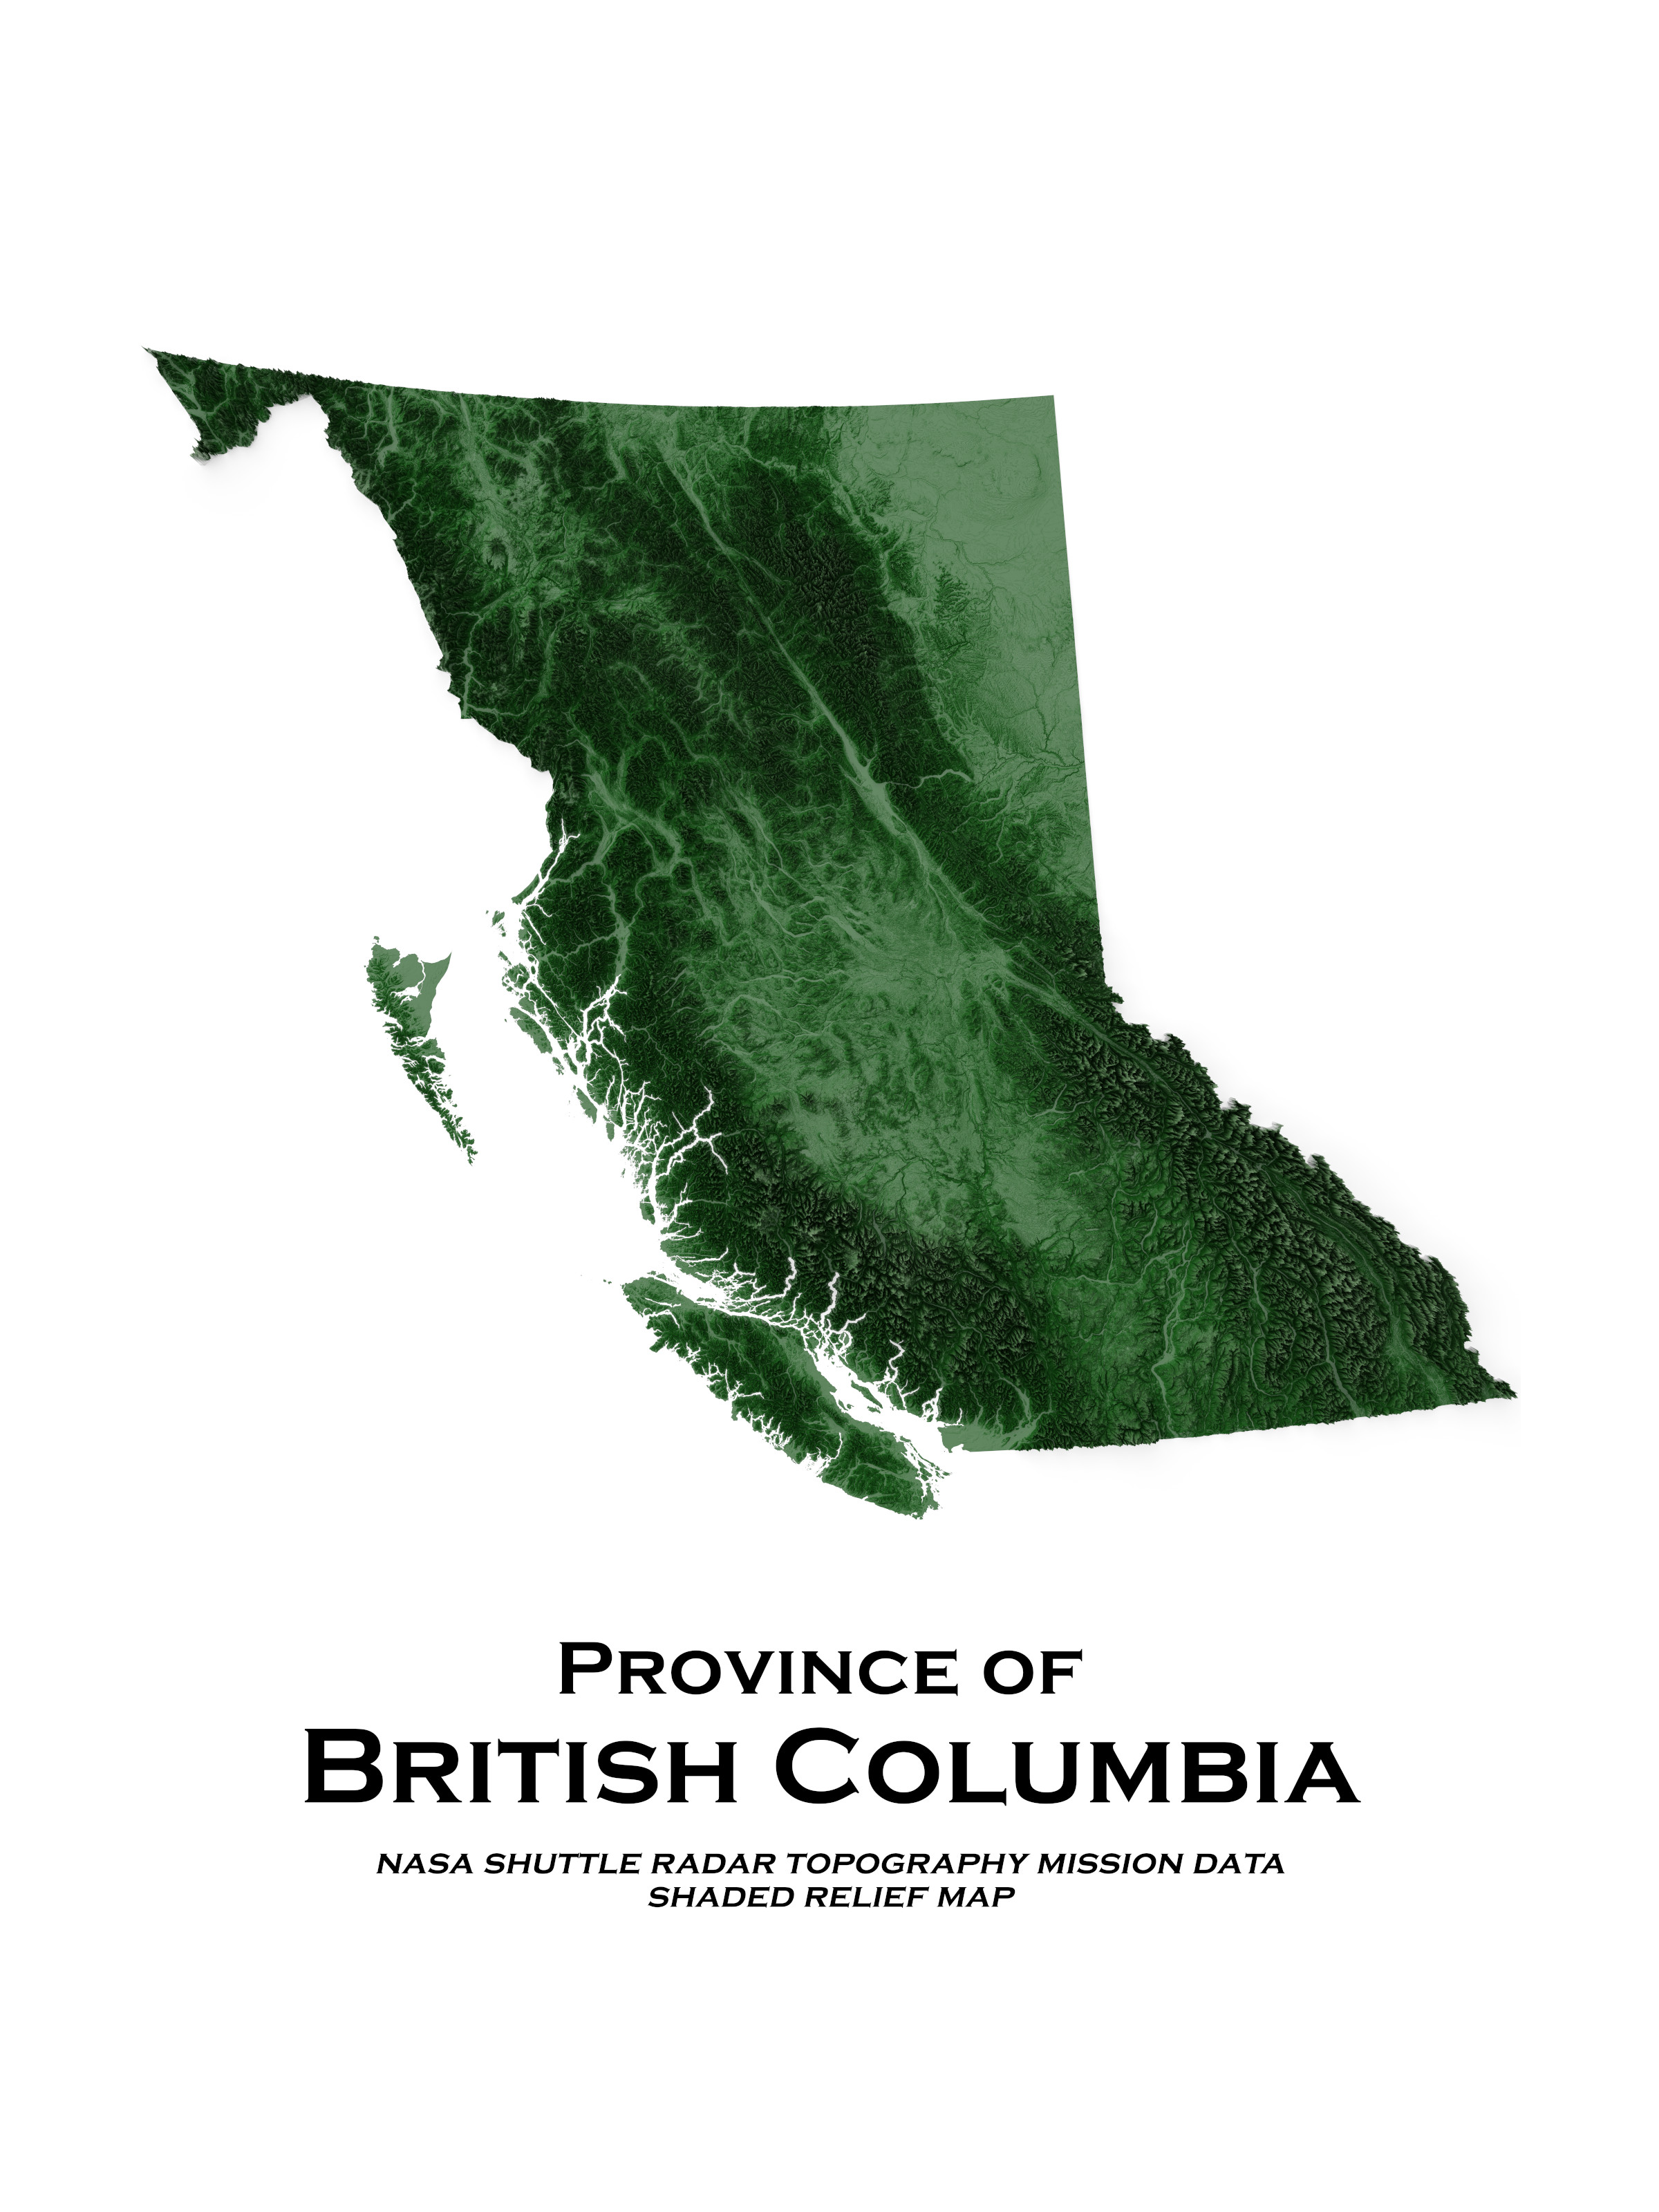
Shaded Relief Map
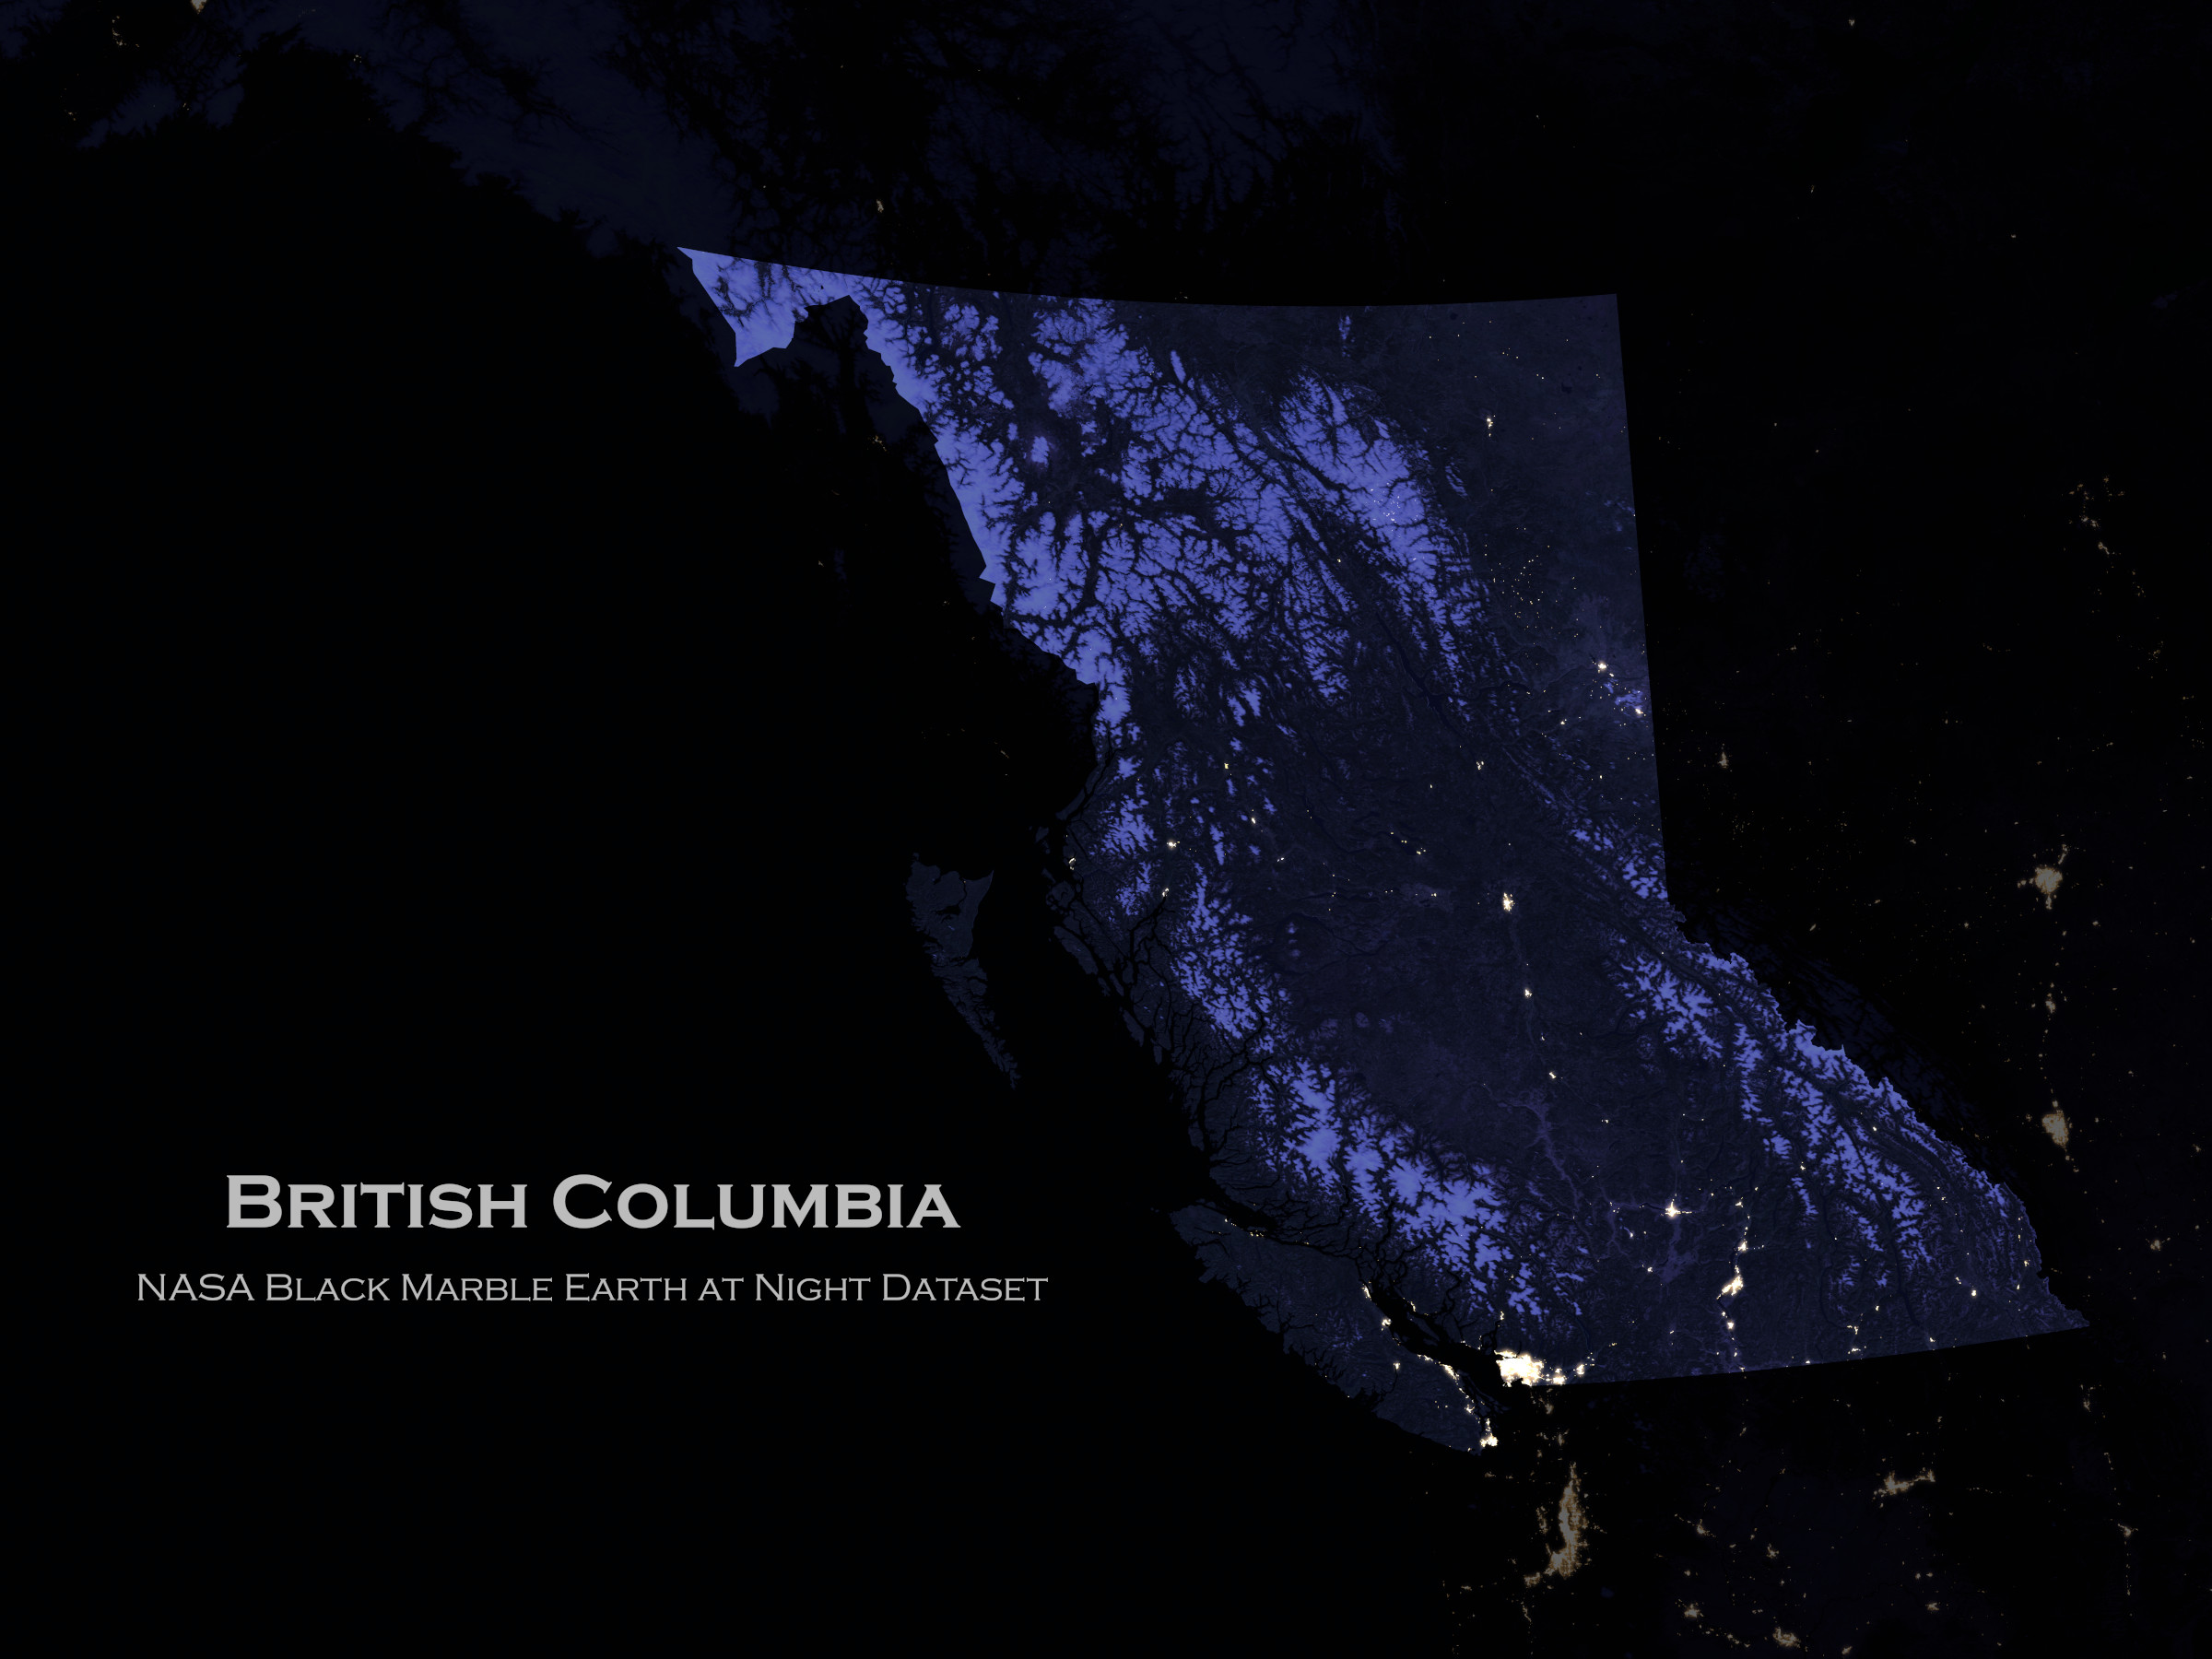
British Columbia at Night
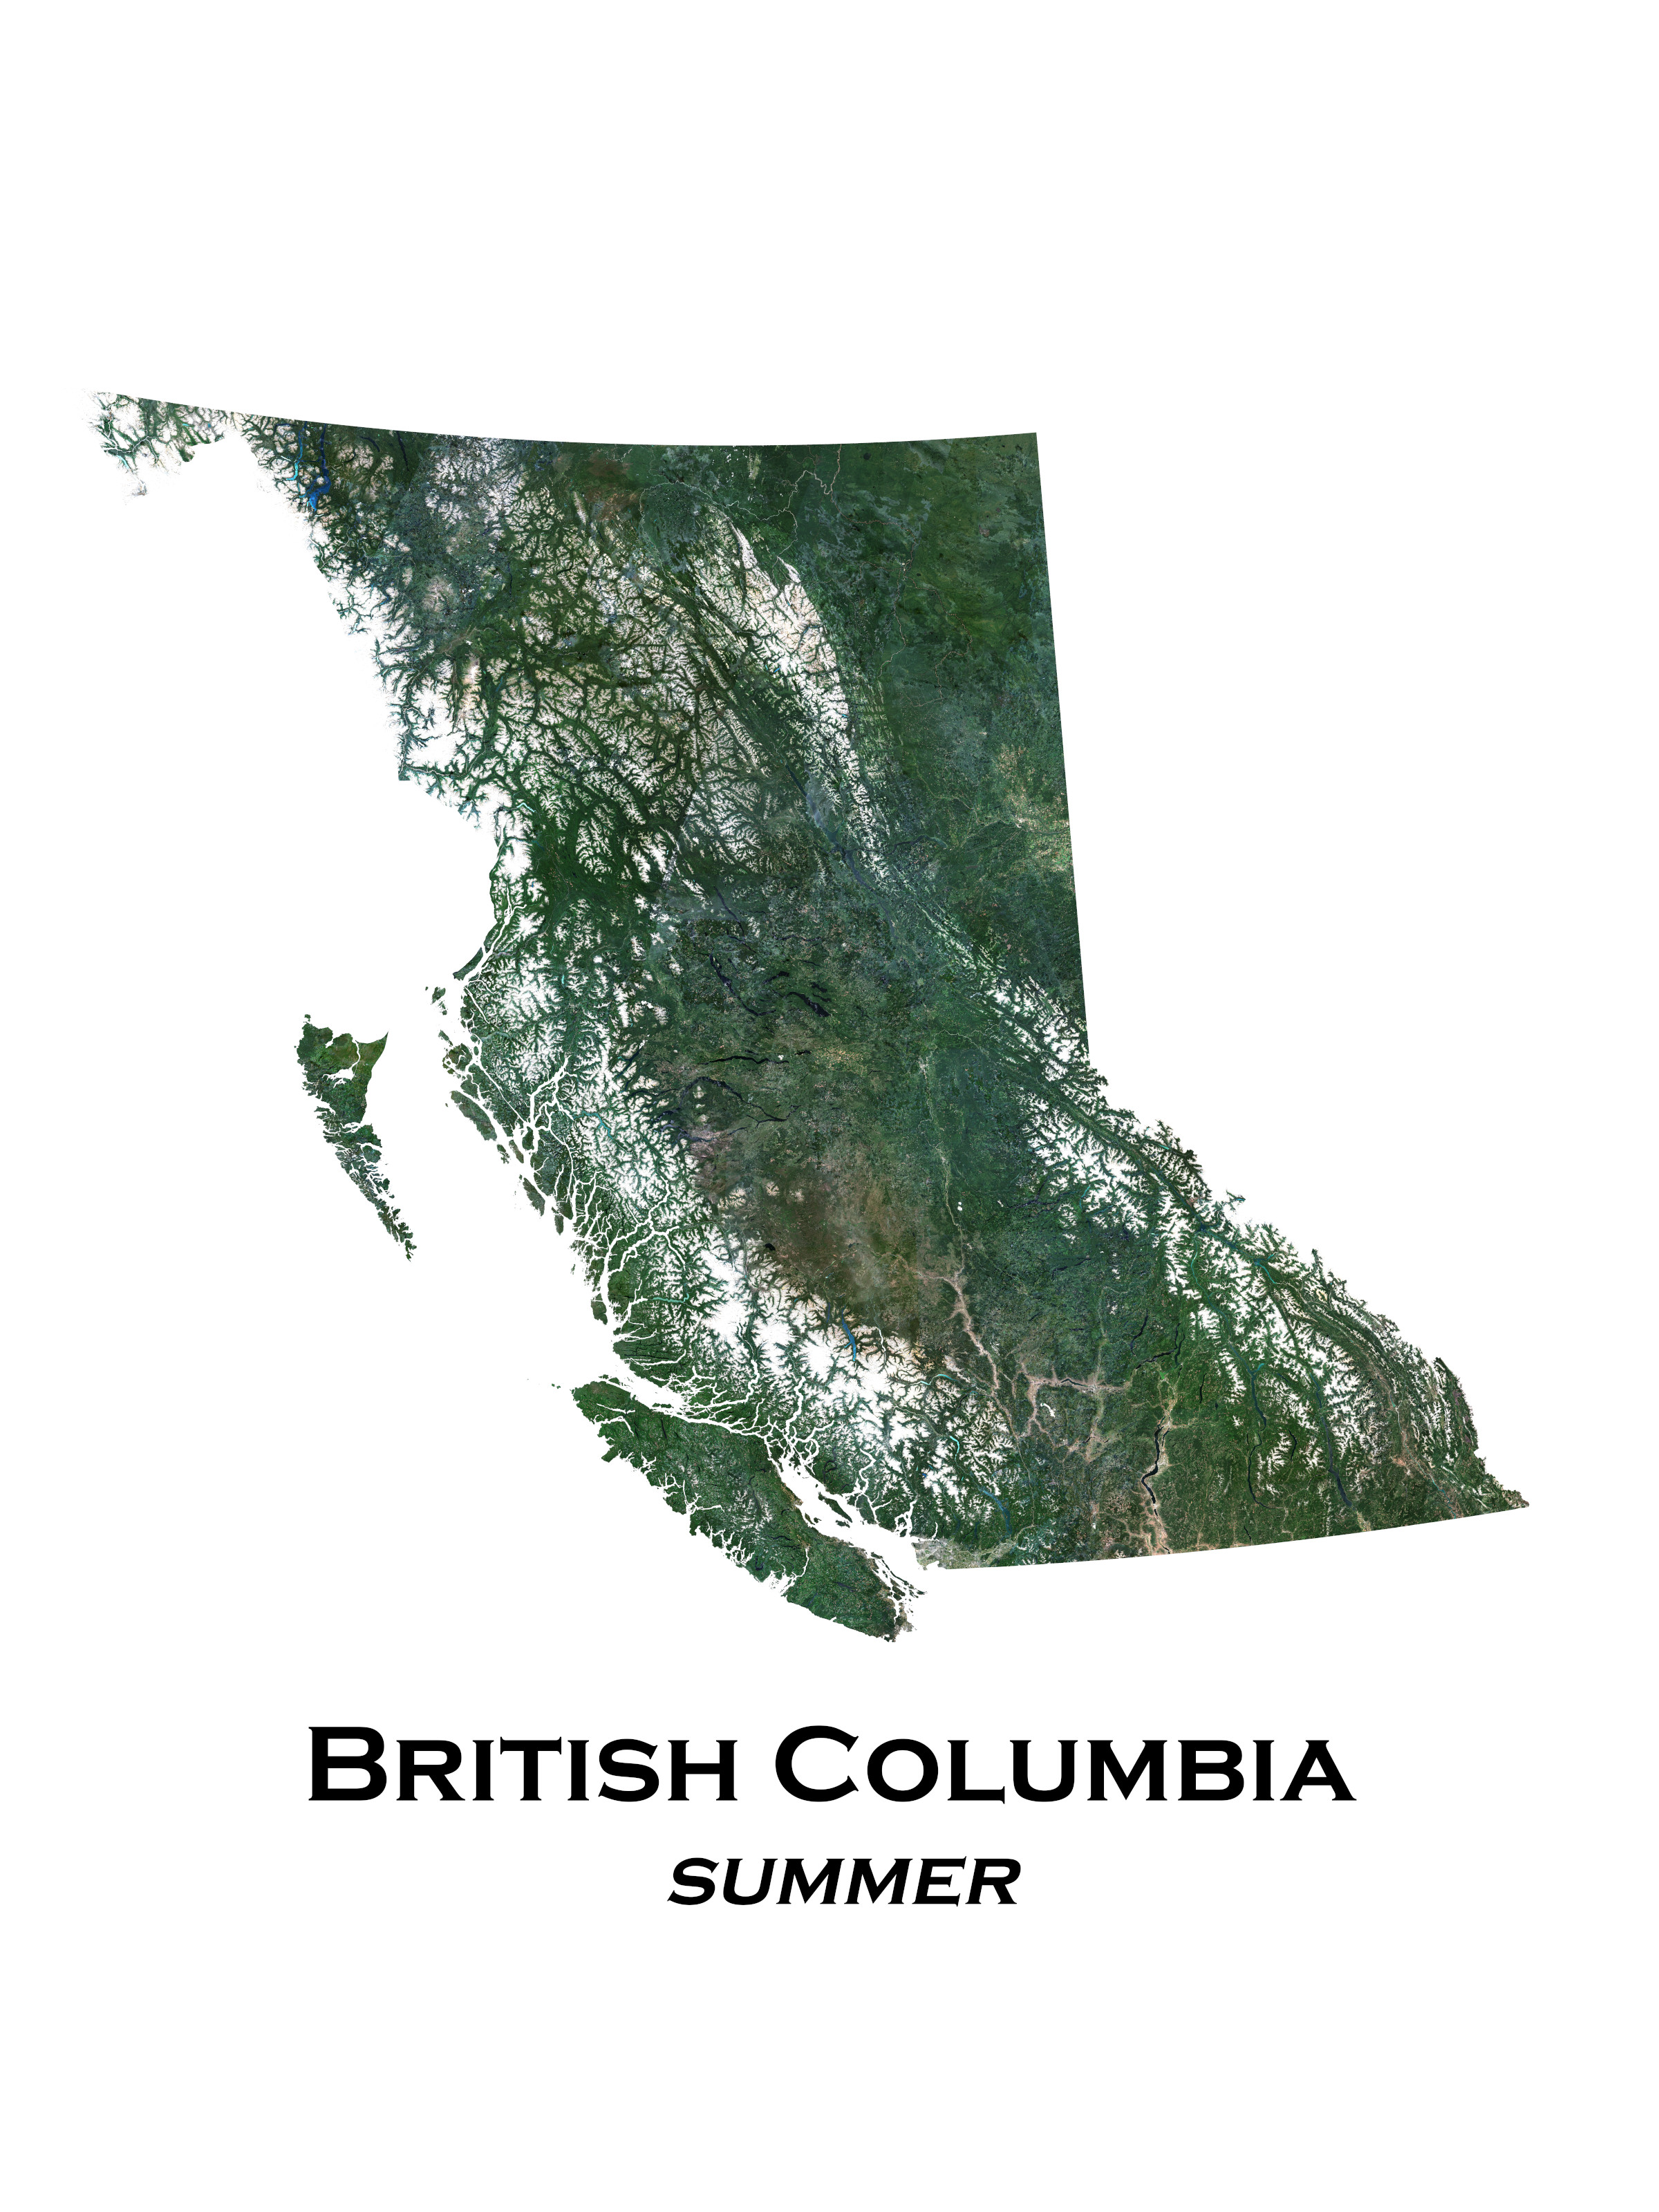
Cloud-free Summer
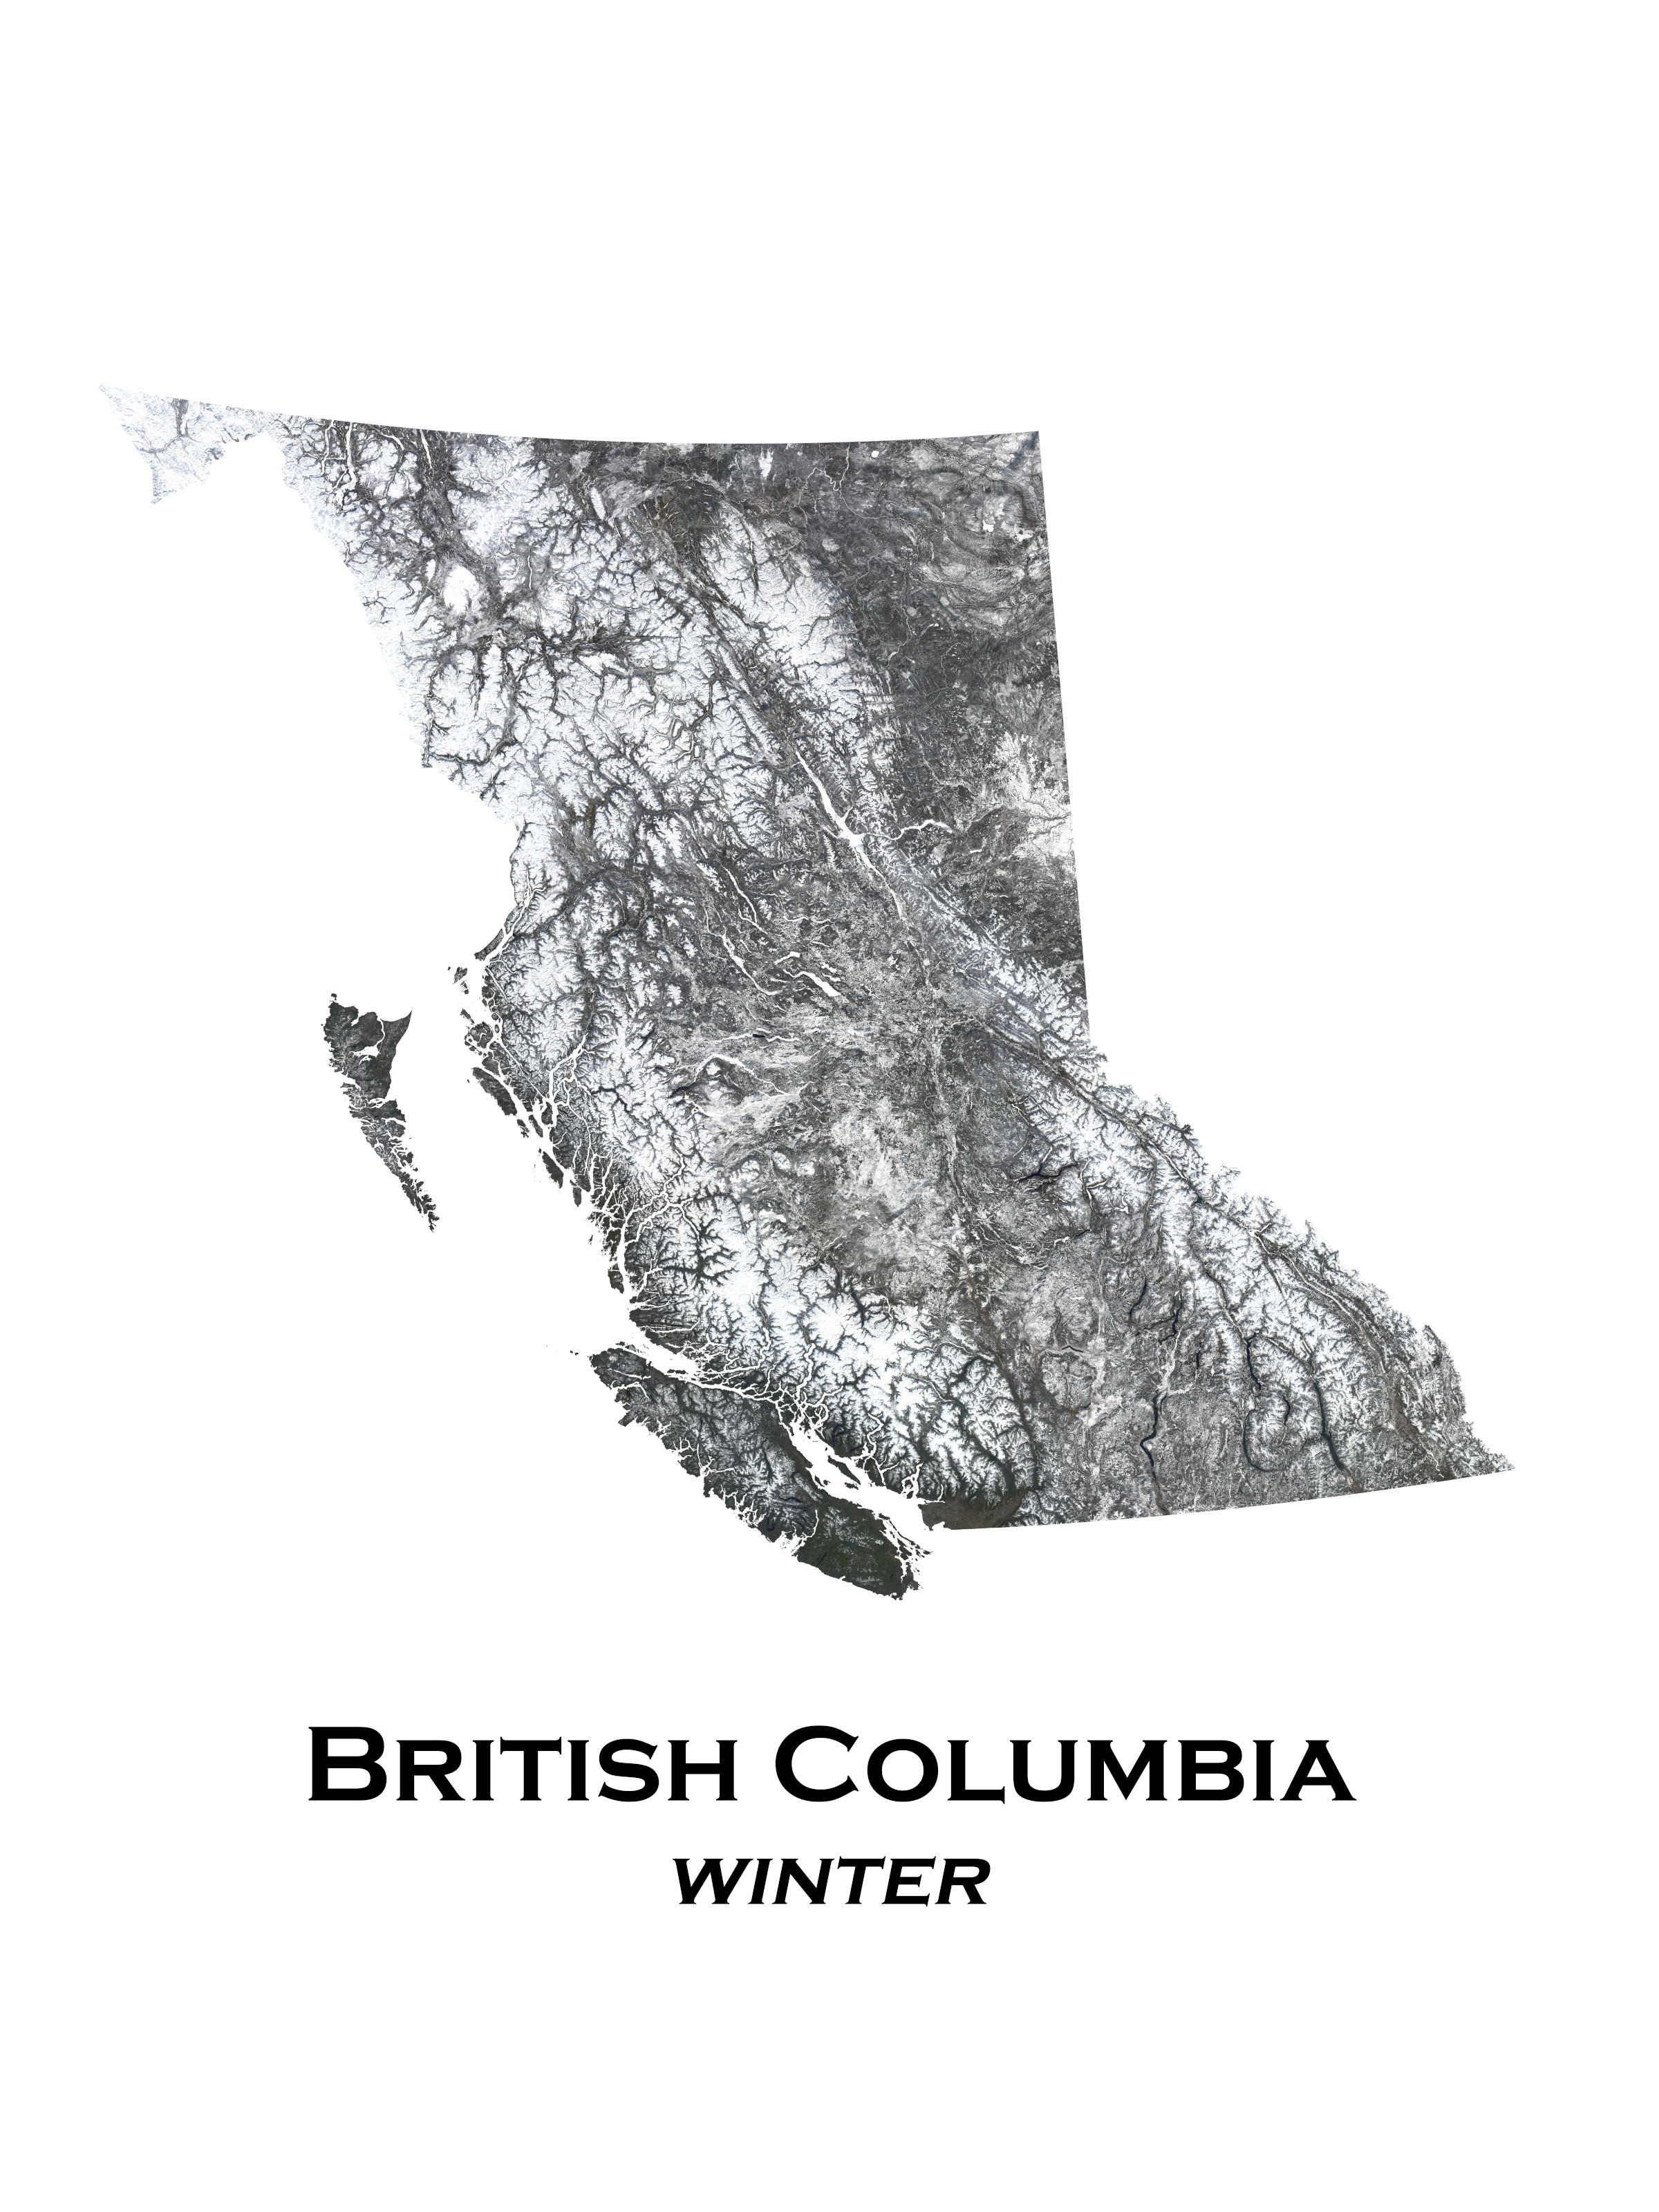
Cloud-free Winter
Thoughts
Generating the images followed a similar workflow. Locate and download the dataset, combine the tiles and reproject, optional postprocessing of the data, and then migrating from geospatial data to a finalized image.
Each of these steps required a different skill set and software tools. The initial step of data acquisition remains stubbornly difficult, as data is spread across different platforms and APIs. Finding geospatial products depends on a combination of knowing what you want and where to look.
Once you have the data, there’s excellent open source programs (QGIS and GDAL) to handle the geospatial operations. Creating the shaded relief map relied on postprocessing in the 3D graphics program Blender. It’s quite a complex piece of software, and I barely skimmed the surface of its capabilities. I’m grateful for the tutorials written which provide a guide on how to create these images. This step by step guide in particular was helpful.
I used the GIMP to go from geospatial product to a finalized product. Using GeoTIFFs allows for a smooth transition between geospatial and image editing. The images uploaded to this site were downsampled and compressed to keep the impact on the server bandwidth minimal. The original images were generated at a quality suitable to print out as posters. Let me know if those are of interest!